This article explains how to use the Mail Merge feature in MS Word to create and to print form letters by using data from a Database or spreadsheet.
1. What is Mail Merge in Word?
2. What are the components included in Mail Merge?
3. Importance of Mail Merge
4. How to use Mail Merge?
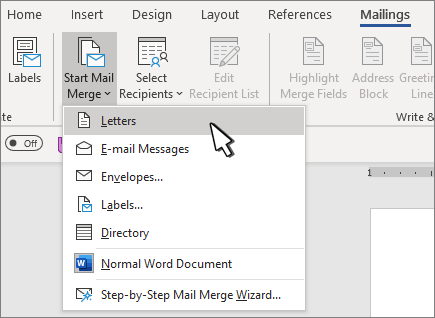
What is Mail Merge in Word?
Mail merge is a feature of MS Word which allows you to send similar letter or document to different recipients (receivers). It is a tool by which we can send data in the form of letters, E-mail messages, envelopes, labels, directory etc. to a bulk of recipients. It actually links the main content of the letter with a data source (list) which contains recipients’ name, address and other data.
What are the components included in Mail Merge?
The mail merge process involves the following components:
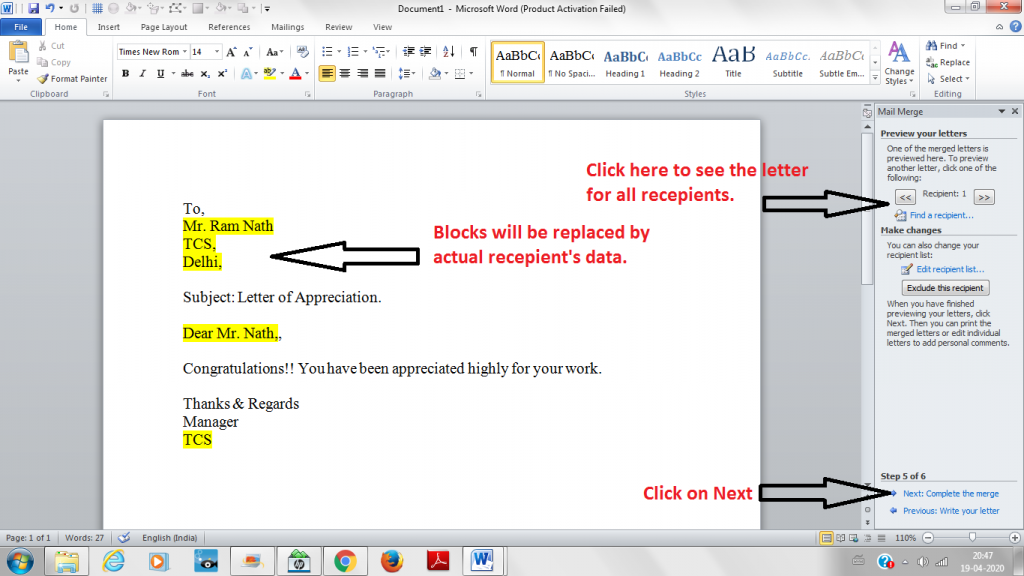
- The Main Document – contains the main data (letters, envelopes, labels etc) that is same for each version of the merged document. It is actually the template of letter in which the recipients’ information is kept empty. Mail merge process fetches the recipients’ data from the data source and replaces in the template letter until letters for all recipients have been created.
- Data Source – It is a database or spreadsheet file that contains the information to be merged into a document. For example, the names and addresses of the recipients (receivers) of a letter etc.
Importance of Mail Merge
- Mail merge allows you to create a large number of documents (letters, envelopes, labels etc) that are customized for each recipient. For example, address block and greeting line is changed according to the recipient in the same letter.
- It helps in automating the process of sending bulk e-mail messages to customers or subscribers.
- There is no need to prepare individual letters or documents for many people. So, it saves your time and efforts by simplifying the task of mass mailings.
How to use Mail Merge?
Let us understand the steps of mail merge along with pictures:
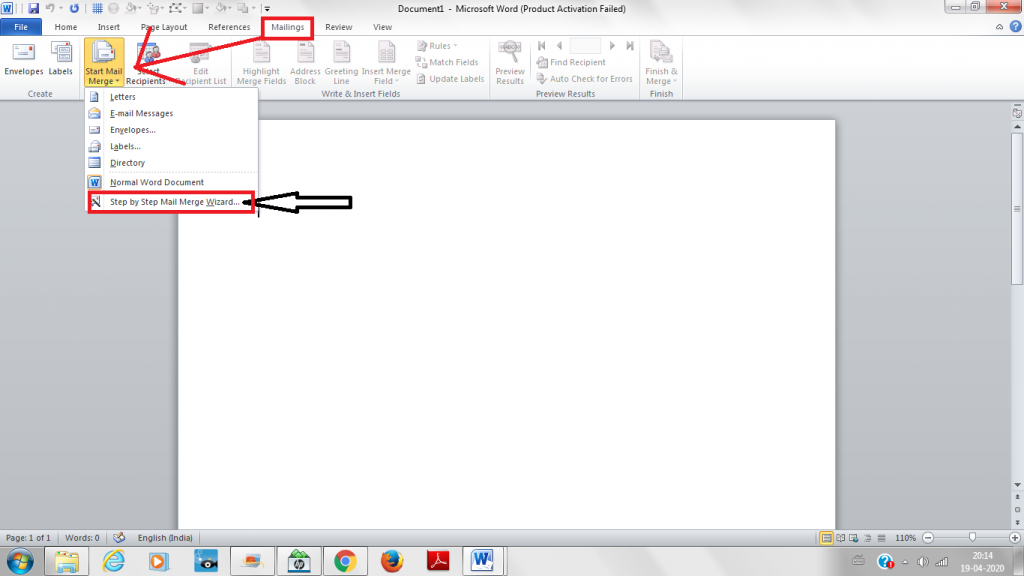
1. Select “Mailings” tab from the ribbon in MS-Word.
2. Select “Start Mail Merge” button present in the “Start Mail Merge” group and a drop down menu will appear.
3. Select “Step by Step Mail Merge Wizard” from the drop down menu.
4. A task pane will get opened on the right side of the document which contains six steps to complete the mail merge procedure.
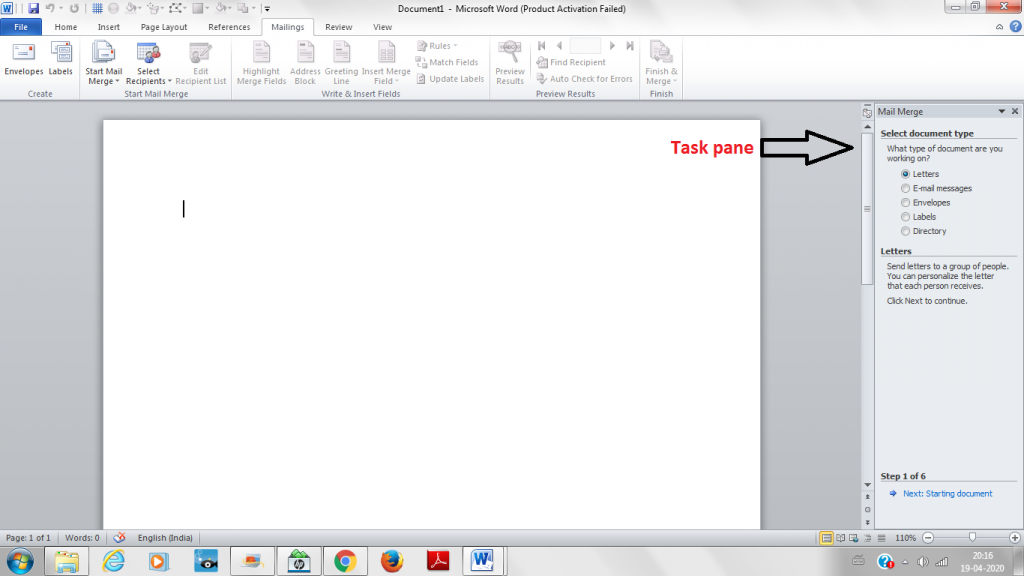
The six steps are as follows:
I. Select Document type
II. Select Starting document
III. Select recipients
IV. Write your letter
V. Preview your letters
VI. Complete the merge
Let us understand each step one by one:
I. Select Document type: You have to select the type of document which you want to create like letters, envelopes, labels etc. For example, here we click on “letters”. Then click on “Next” present in the bottom of the task pane.
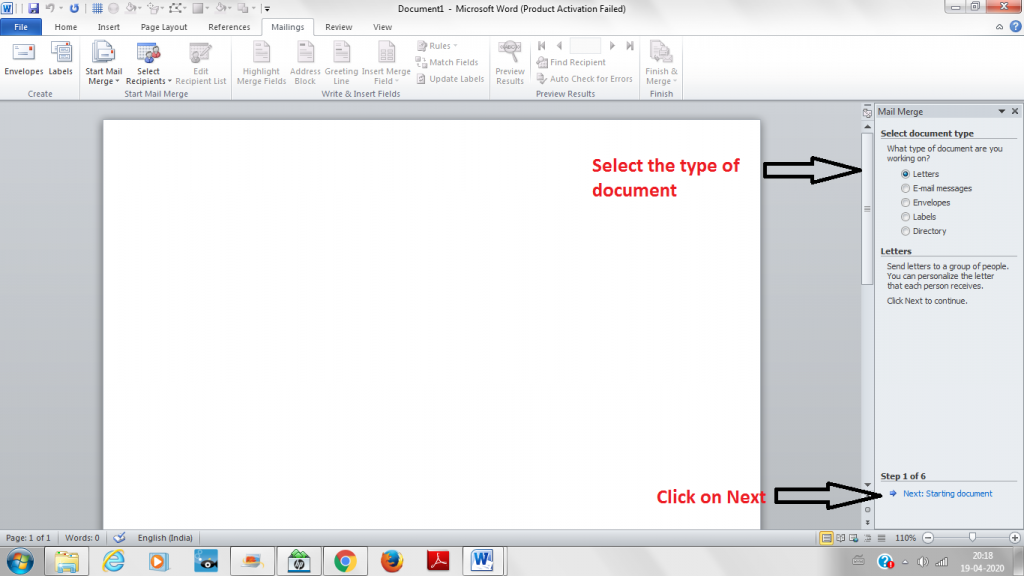
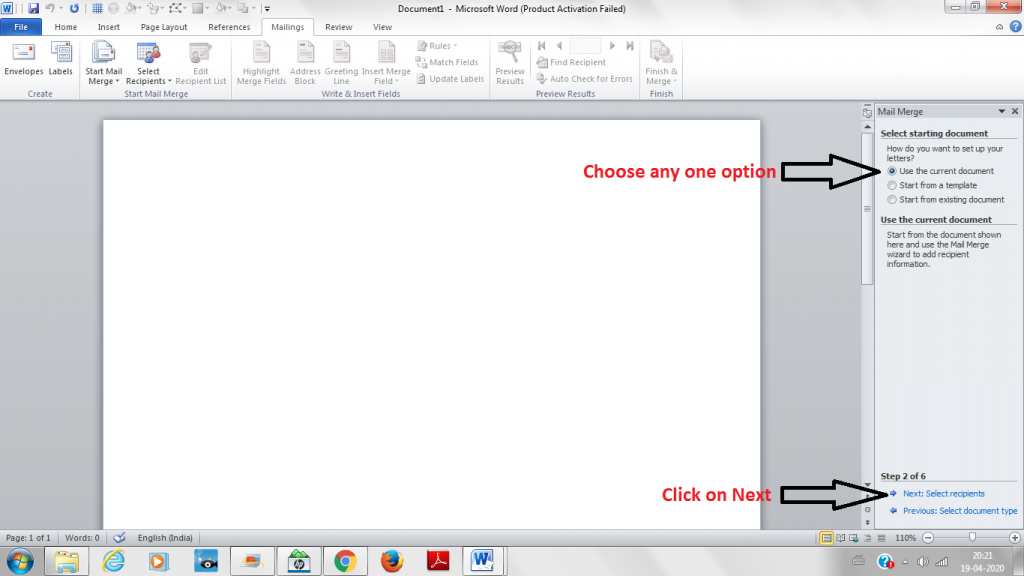
II. Select Starting document: In the second step, you have to select any one option out of three:
- Use the current document: This is the blank document already on screen.
- Start from a template: Use this option if you already have a letter template that you want to use.
- Start from existing document: Open an existing document that already contains the pre-typed text.
For example, here we choose the first option i.e. “Use the current document” and click on “Next” present in the bottom of the task pane.
III. Select recipients: The next step is to create the file that contains the recipients’ names and addresses (the Data Source) so that Word can attach it to the letter. There are three options for moving forward in this step:
- Use an existing list
- Select from Outlook contacts
- Type a new list.
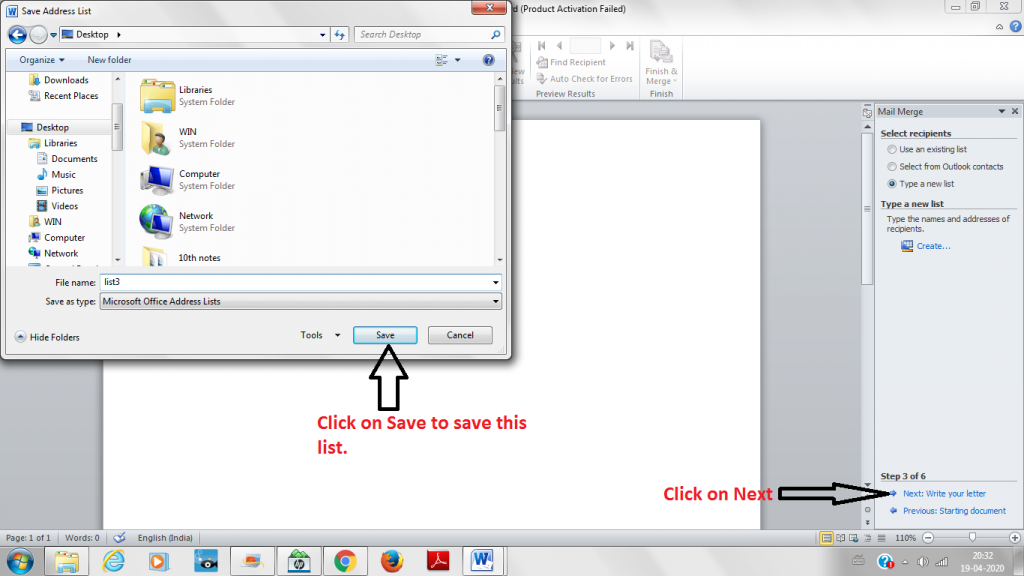
In this example, we choose third option i.e. “Type a new list” and create a list of receivers with their names, address, company name etc. Save this list at a location in your system. Then click on “Next” present in the bottom of the task pane.
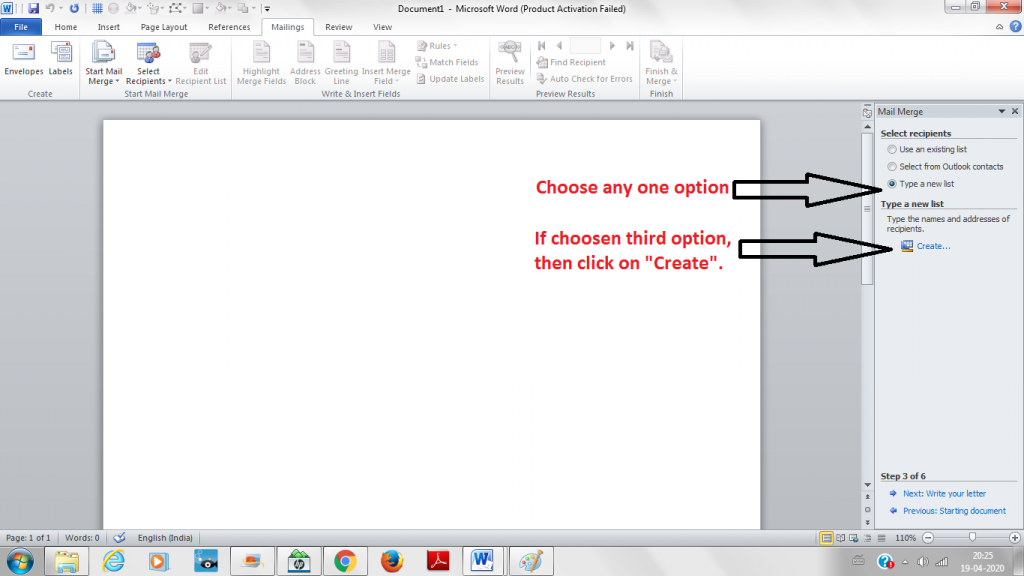
After clicking on Create, dialog box to Create New Address List will be opened:
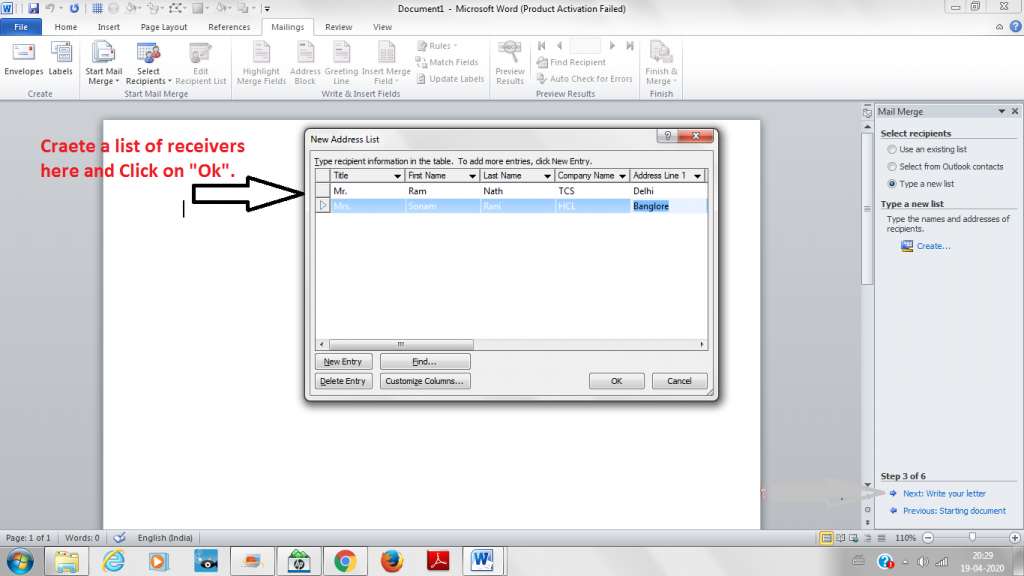
After clicking “OK”, save this list at a location on your Computer.
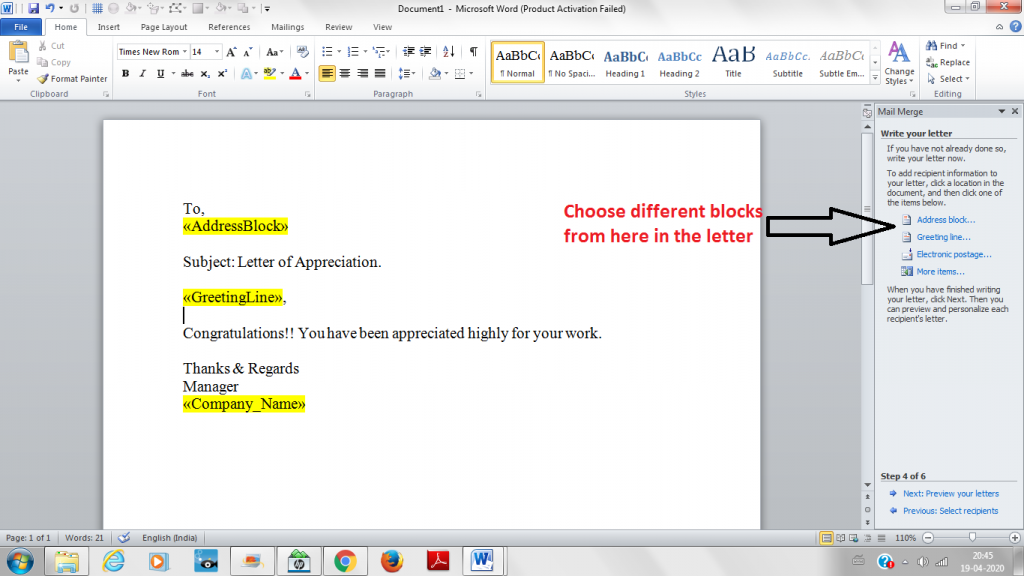
IV. Write your letter: You have to write the main content of your letter here. In the salutation part you can write “<<GreetingLine>>”, in the address part you can write “<<AddressBlock>>” etc. to change the letter for every receiver. Then click on “Next” present in the bottom of the task pane.
V. Preview your letters: Click the arrow buttons in the Task Pane to preview the letters. Then click on “Next” present in the bottom of the task pane for the last step. Look at the preview of our two letters according to the saved list of recipients in the below pictures:
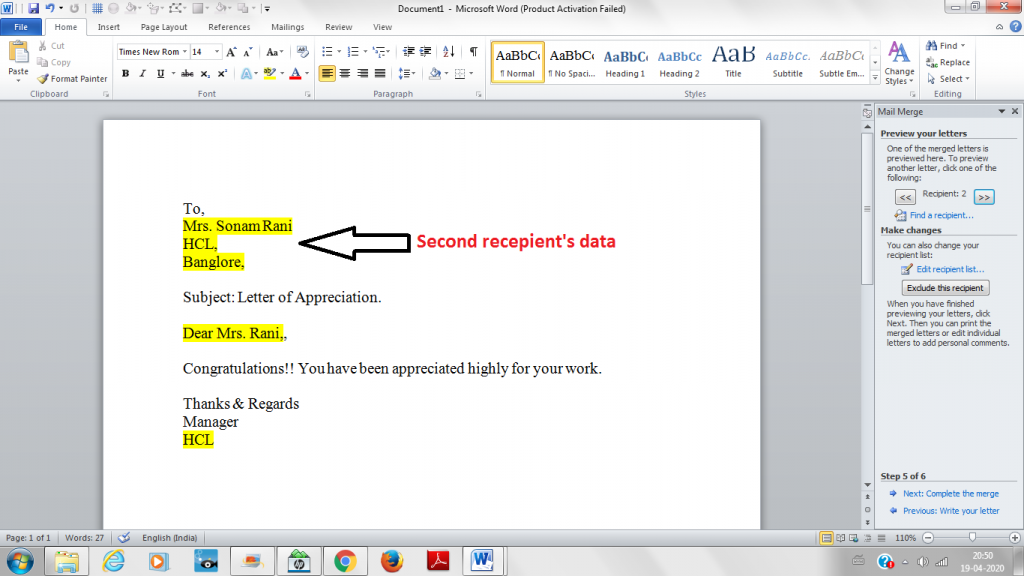
VI. Complete the merge: You are now ready to print the letters and there are two options:
- Print: Click this option to print the letters.
- Edit individual letters: This allows you to personalize individual letters.
You can also refer official document of Mail merge at Microsoft support link.
Find more blogs on MS-Word here.
